
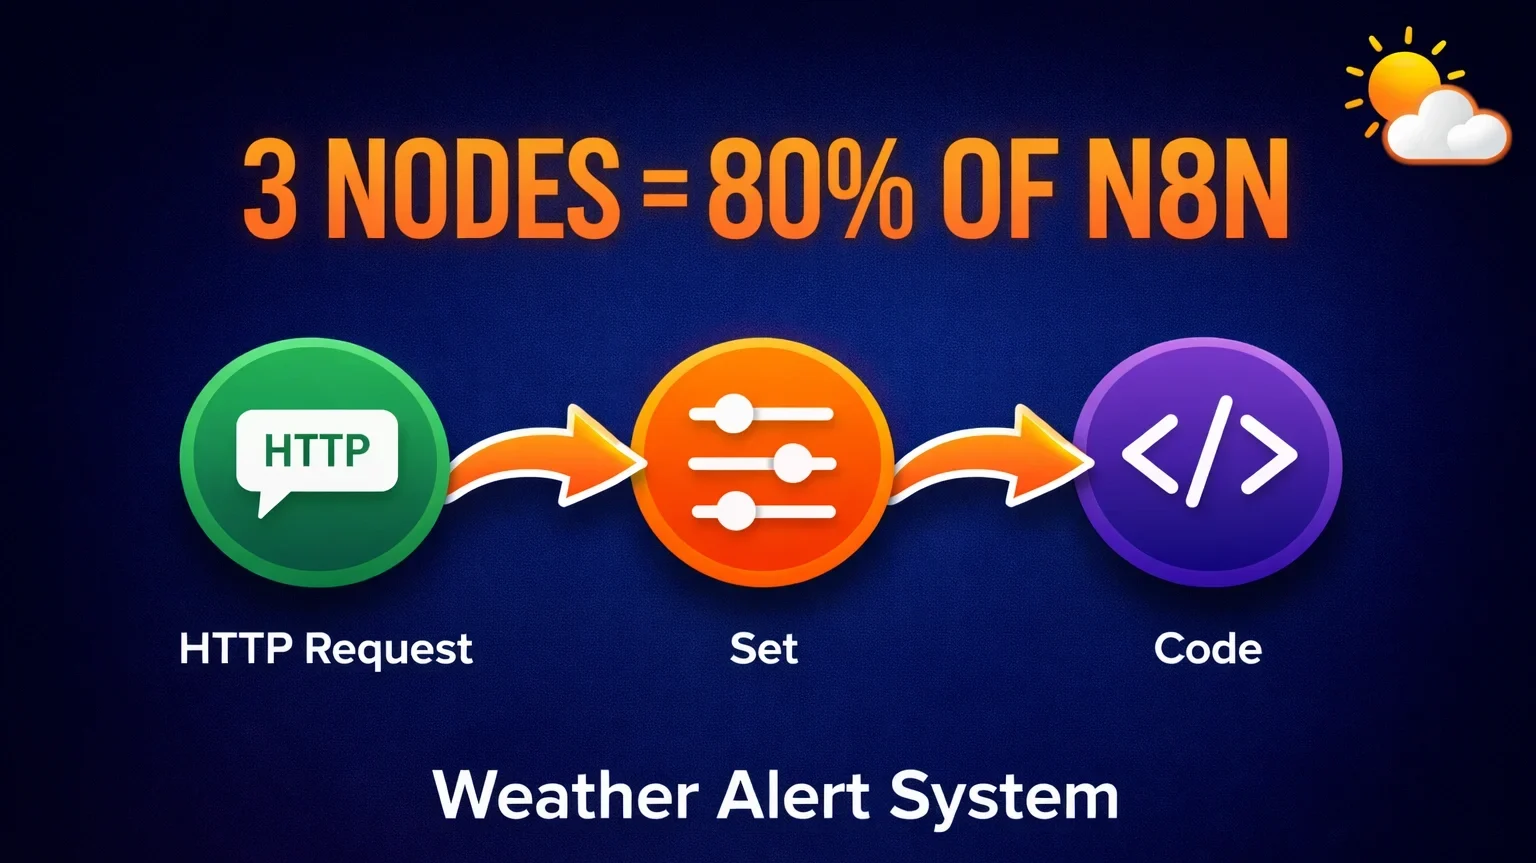
These three nodes, HTTP Request, Set, and Code, handle about 80% of everything I build in n8n. Once you understand how they work together, you can connect n8n to almost any service on the internet.
In this tutorial, we will build a practical daily weather alert system that sends notifications to both email and Slack every morning at 8 AM.
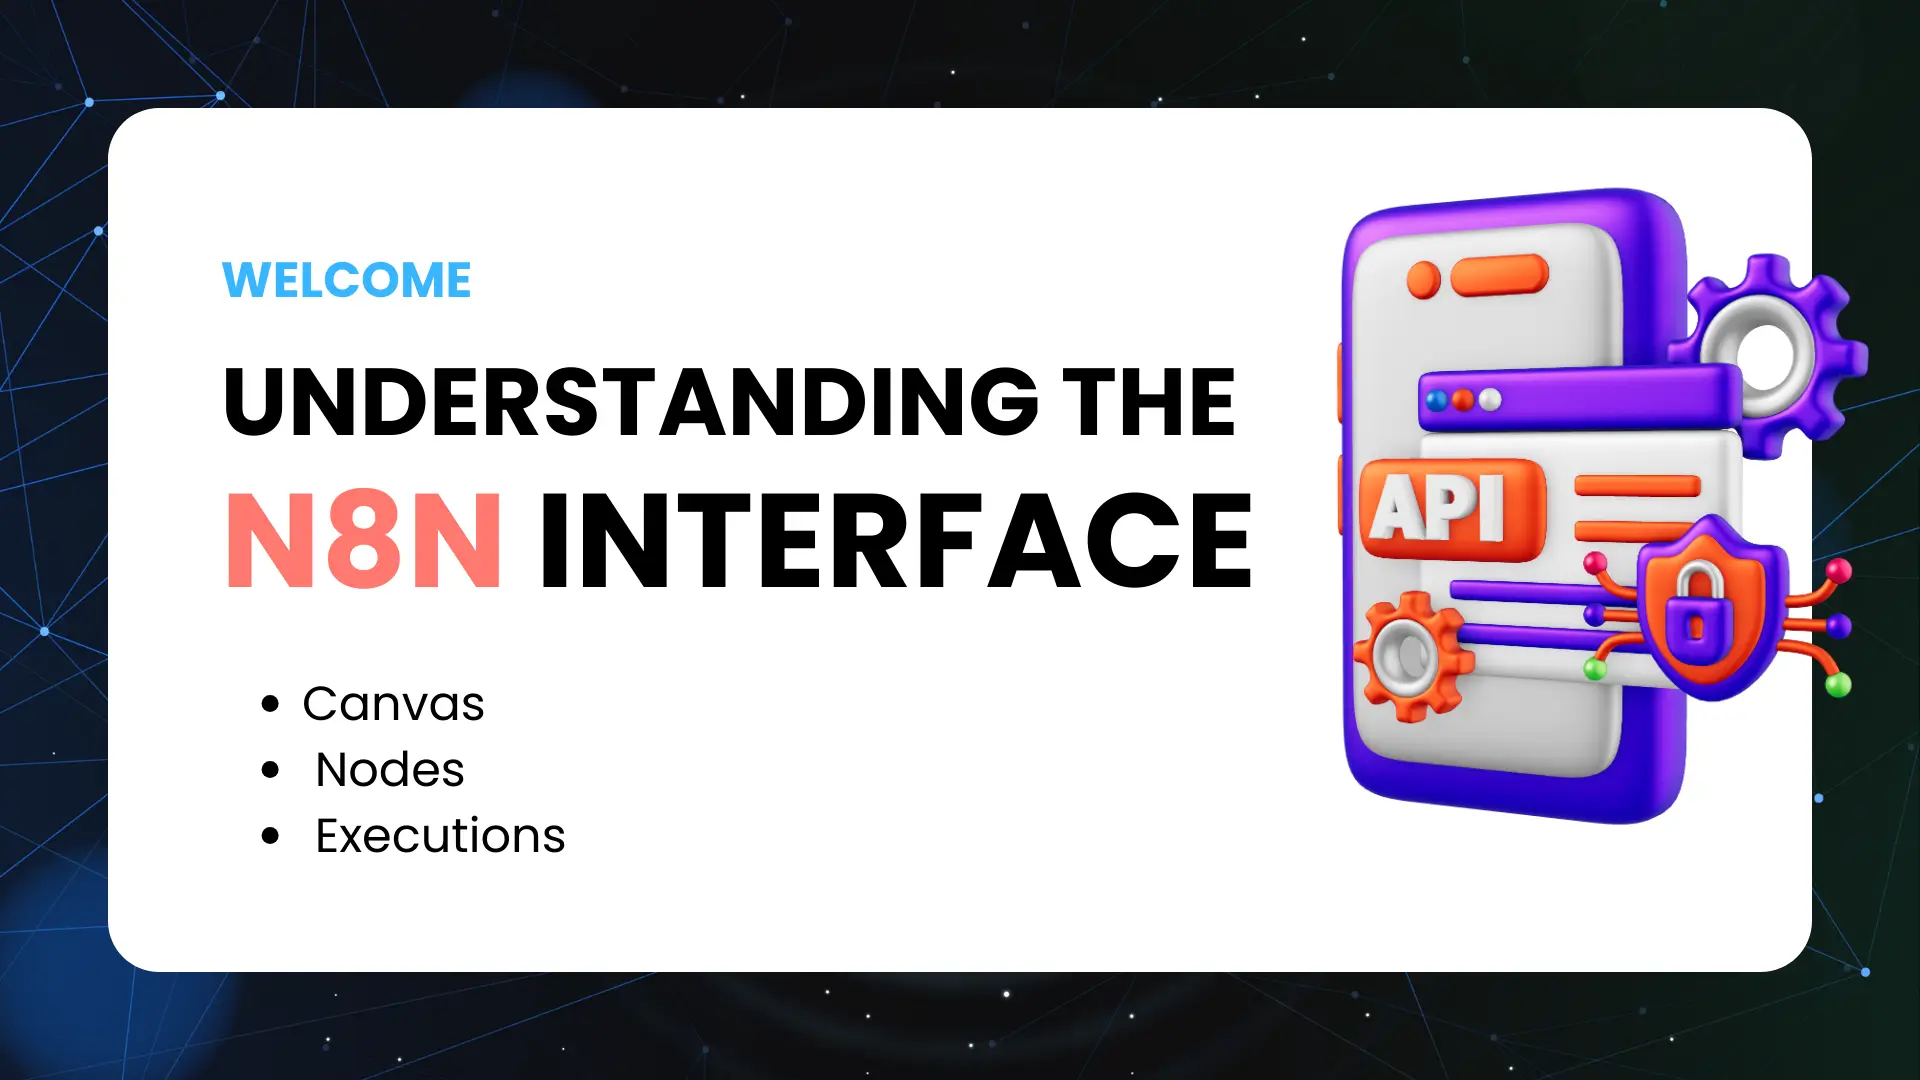
What You Will Need
Before we start:
- n8n installed (self-hosted or n8n.cloud)
- OpenWeatherMap free account (takes 2 minutes to sign up)
- Gmail or Slack credentials set up in n8n
- About 20 minutes to follow along
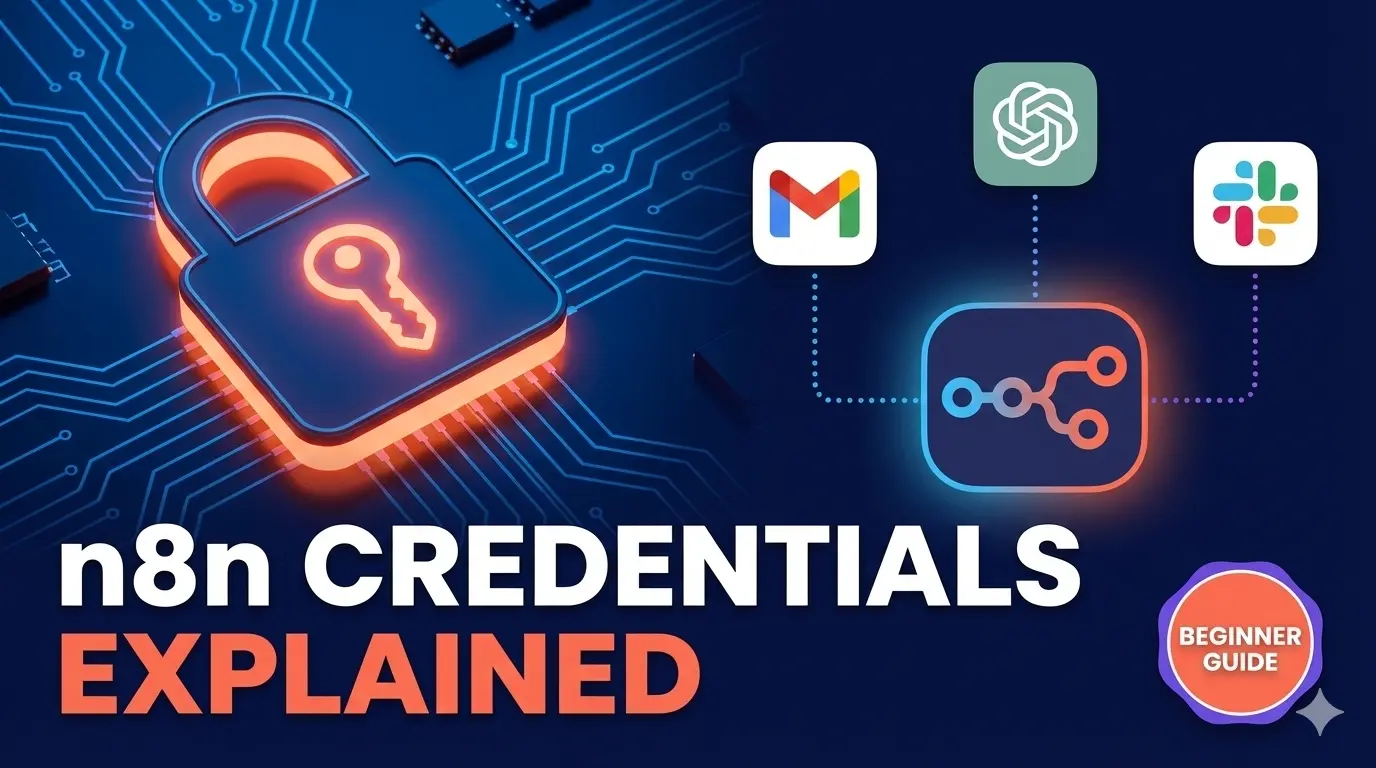
If you haven’t set up credentials yet, check out my previous tutorial on n8n Credentials Management.
The Complete Workflow
Here’s what we’re building – a workflow that runs daily, grabs weather data, processes it, and sends alerts to multiple channels.
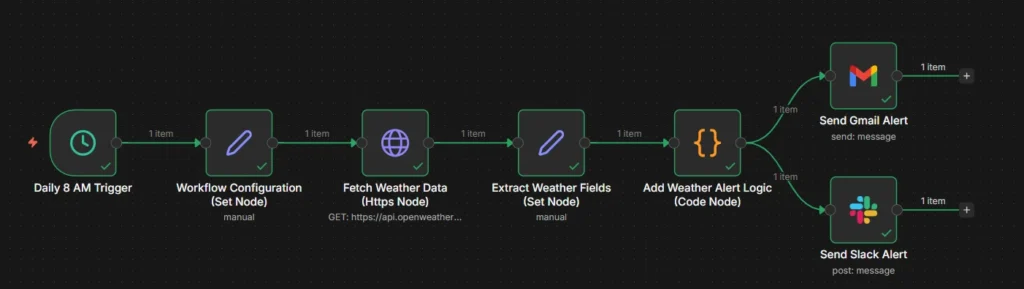
Let me break down each piece.
Step 1: Setting Up the Schedule Trigger
First, we need our workflow to run automatically every day at 8 AM.
Add a Schedule Trigger node and configure it:
- Trigger Interval: Days
- Days Between Triggers: 1
- Trigger at Hour: 8am
- Trigger at Minute: 0
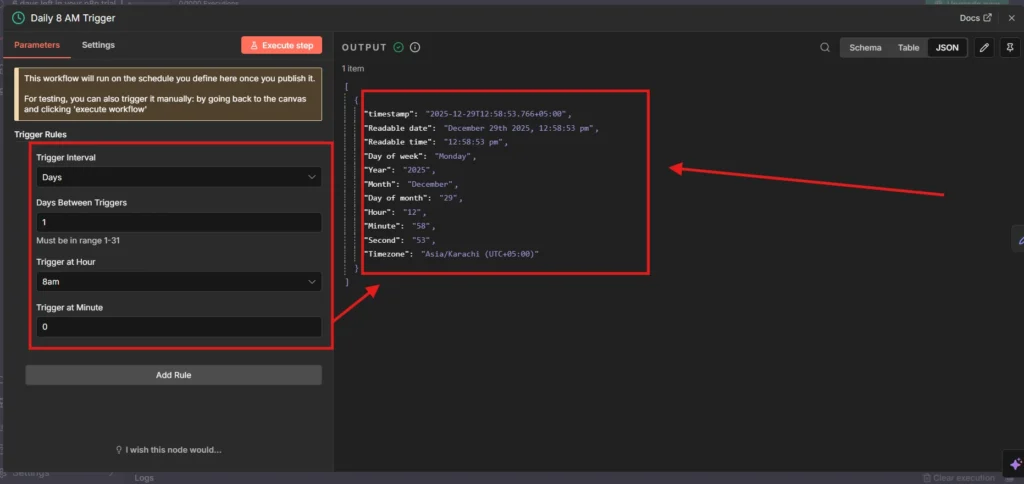
The output shows useful data like the day of week, which we’ll include in our weather report later.
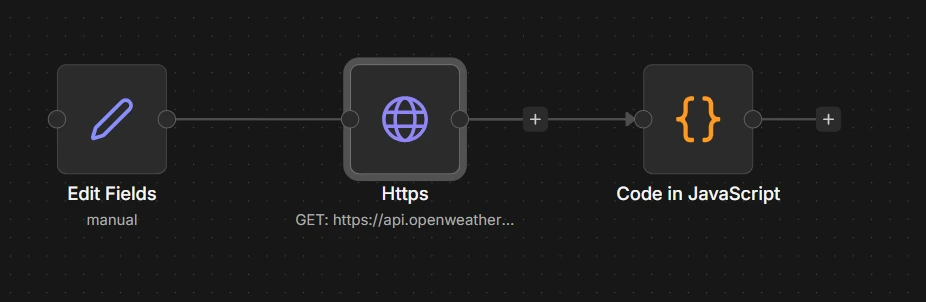
Step 2: Workflow Configuration with Set Node
Here’s where the Set node comes in. I use it to define variables that I might want to change later – like the location or workflow name.
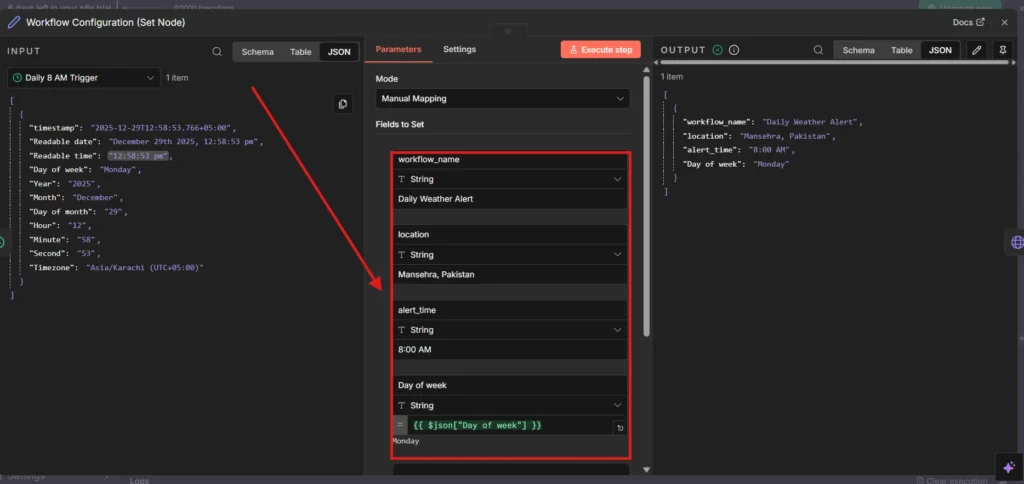
I added:
- workflow_name: “Daily Weather Alert”
- location: “Mansehra, Pakistan”
- alert_time: “8:00 AM”
- Day of week: Pulled from the trigger output
Why bother with this? If I ever want to change the location, I only update one place instead of hunting through every node.
Step 3: HTTP Request Node – Grabbing Weather Data
This is where the magic happens. The HTTP Request node lets n8n talk to any API on the internet.
For OpenWeatherMap, the setup is straightforward:
- Method: GET
- URL:
https://api.openweathermap.org/data/2.5/weather?q=Mansehra,pk&appid=YOUR_API_KEY&units=metric
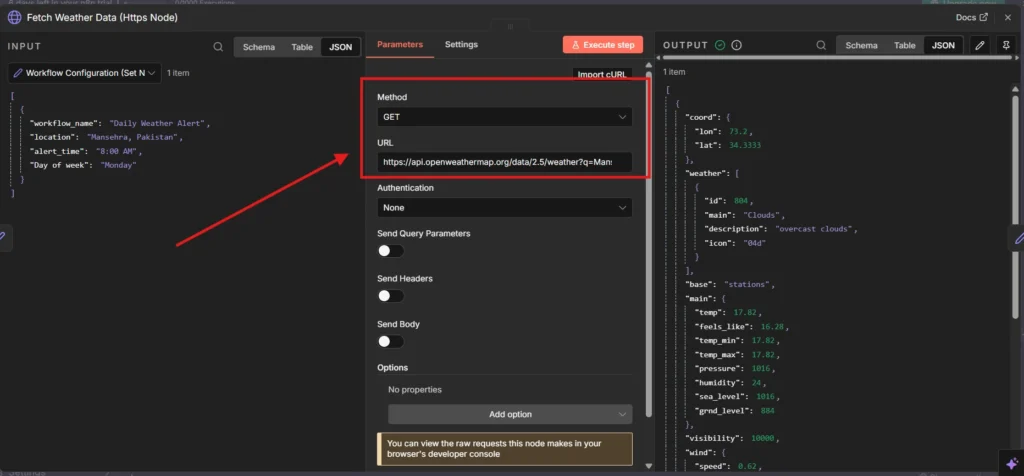
Hit “Execute step” and you’ll see a massive JSON response with temperature, humidity, wind speed, and more. The API returns way more data than we need, which brings us to the next node.
Step 4: Cleaning Up Data with Set Node
Raw API responses are messy. The Set node helps extract exactly what we need.
I created these fields:
- city:
{{ $json.name }} - temperature:
{{ $json.main.temp }} - feels_like:
{{ $json.main.feels_like }} - weather_condition:
{{ $json.weather[0].description }} - humidity:
{{ $json.main.humidity }}
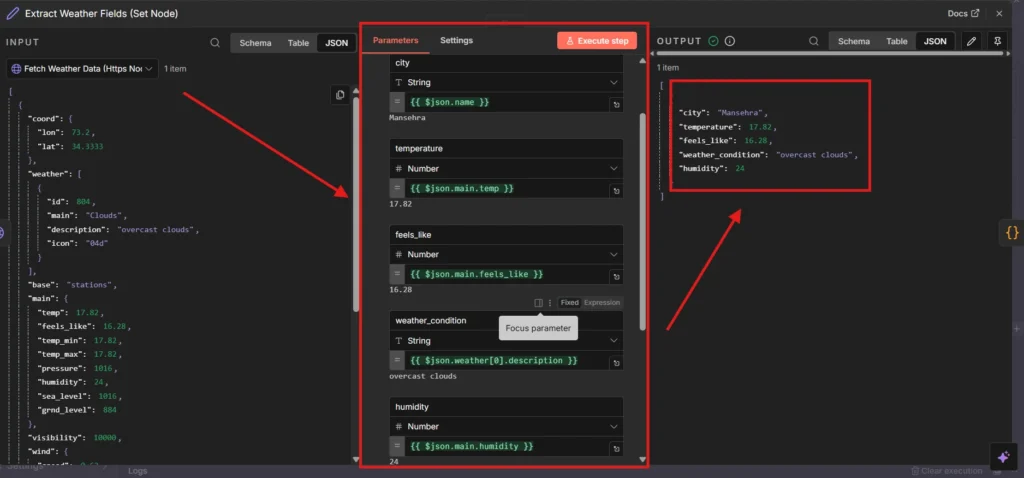
Now instead of a giant JSON blob, we have clean, labeled data ready for the next step.
Step 5: Adding Alert Logic with Code Node
The Code node lets you write custom JavaScript. I used it to add smart alerts based on temperature.
const items = $input.all();

const outputItems = items.map(item => {
  const temp = item.json.temp;
  let alertMessage = '';

  if (temp > 35) {
    alertMessage = 'Heat Warning';
  } else if (temp < 5) {
    alertMessage = 'Cold Alert';
  } else {
    alertMessage = 'Normal conditions';
  }

  return {
    json: {
      ...item.json,
      alert: alertMessage
    }
  };
});

return outputItems;
Simple if/else logic, but it transforms a basic weather report into something actionable.
Step 6: Sending Notifications
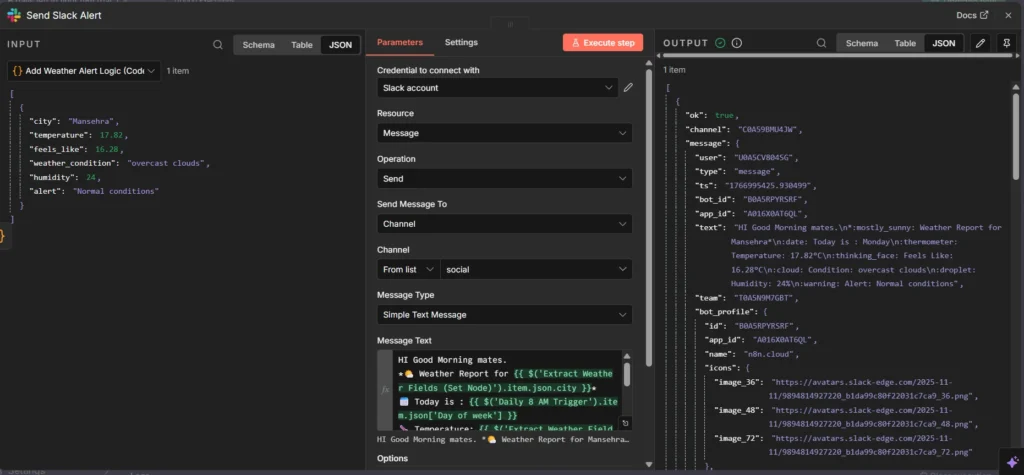
Finally, I connected both Slack and Gmail nodes to send the formatted weather report.
Slack Configuration:
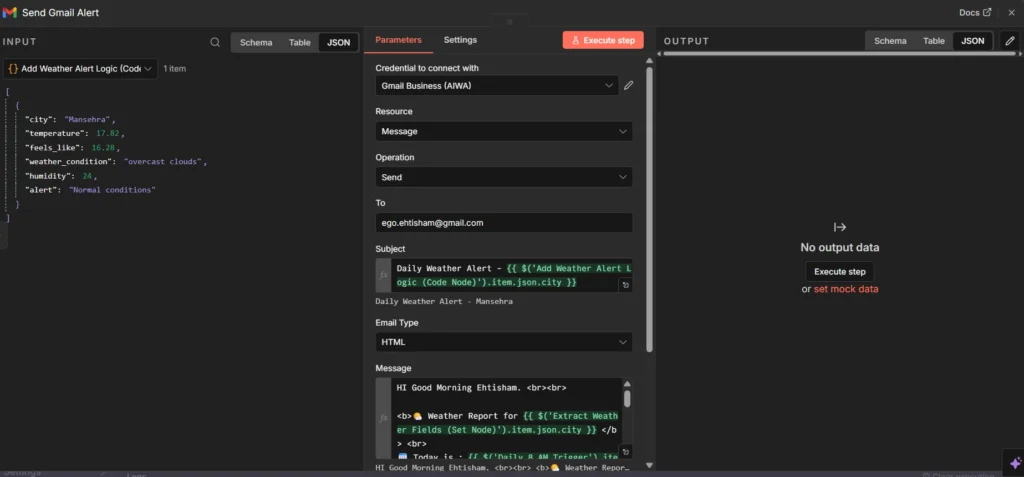
Gmail Configuration:
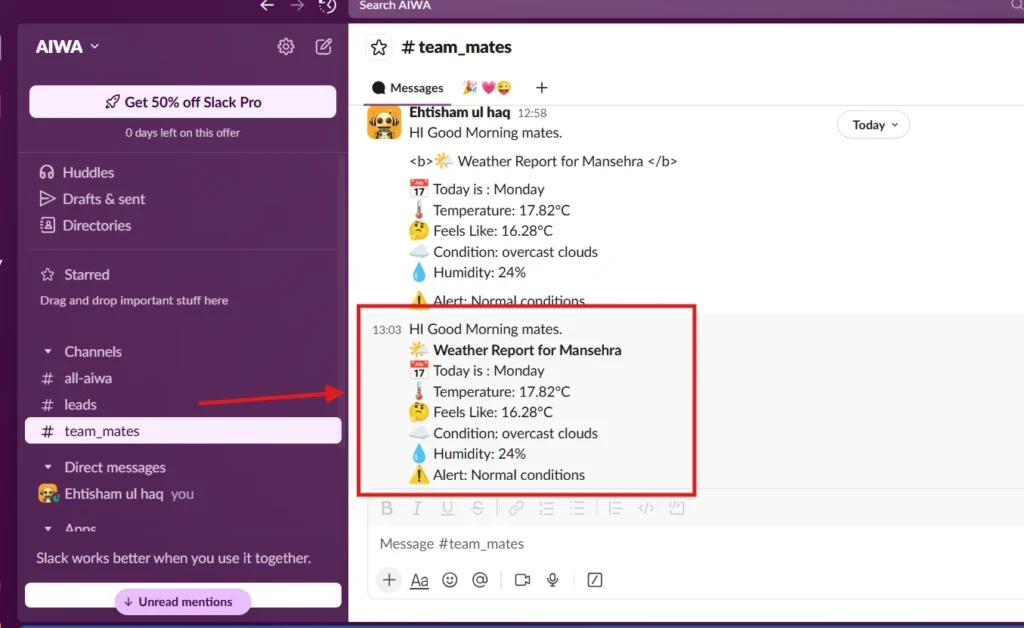
The Results
Here’s the actual weather alert received on Slack:
And the email version:
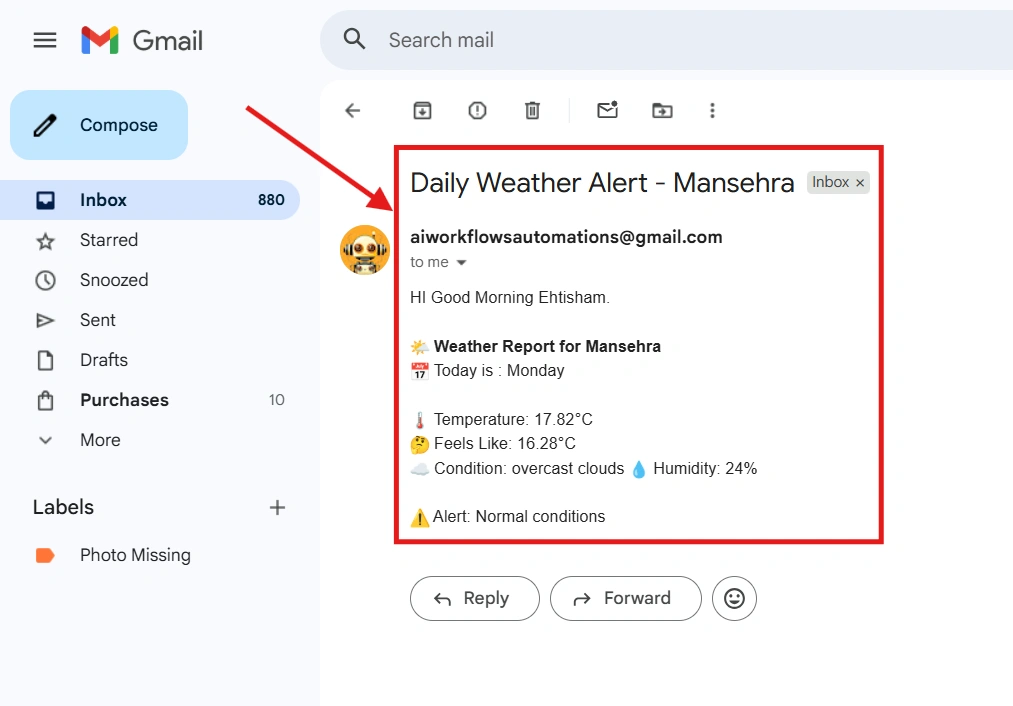
Issue I Hit: Email Formatting
My first email looked terrible – everything crammed into one line.
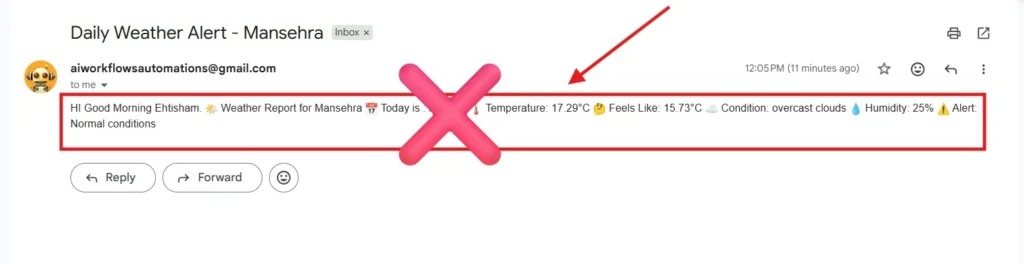
The fix? I switched the Gmail node’s Email Type to “HTML” and added <br> tags for line breaks. Small change, big difference in readability.
Click here for [ERROR LOGGER] Code.
Quick Recap
- HTTP Request Node: Connects to any API, grabs external data
- Set Node: Cleans and transforms data, creates variables
- Code Node: Adds custom logic when built-in nodes aren’t enough
These three nodes are the backbone of most workflows I build. Master them, and you’ll handle 80% of what n8n can do.
What’s Next?
Ready to level up? In the next tutorial, we’ll cover n8n Error Handling – because workflows break, and you need to know when they do.
Here is the full video guide on this blog post: